Saturday, December 21, 2013
Who Can Resist a Christmas Tag? Video Tutorial
Hi! It's almost Merry Christmas time, but just in case you still need some tags to add to your holiday wrappings, I've got a video to share with you today that will teach you three different resist techniques using the wonderful Art Anthology paints and Hampton Art Stamps. If you're all done with your Christmas projects, than don't worry - you can use these techniques any day of the year!
Wednesday, December 18, 2013
Heartfelt Creations Inspiration
Heartfelt Creations Products and Products Carried by HC
HCDP1 238 Floral Key Paper Collection
HCDP1 234 Daphne Paper Collection
HCPC 3570 Floral Doorway and Latch PreCut Set
HCPC 3575 Script Key Background PreCut Set
HCPC 3500 Open Vintage Floret PreCut Set
HCPC 3532 Beautiful You PreCut Set
HCD 732 Decorative Flower Pot Die
HCD 727 Vintage Floret Die
HCD 733 Decorative Lattice Swirl Die
1259723 Art Institute Glue (Dries Clear)
Paper Blossoms Molding Mat
Paper Blossoms Tool Kit
Other Products Used
Tsukineko Ink:VersaMagic - Pixie Dust, Pink Petunia, Niagra Mist
Want2Scrap pearls
Netting
Stickles- Crystal
Xyron Mega Runner, Teresa Collins Foam Adhesives
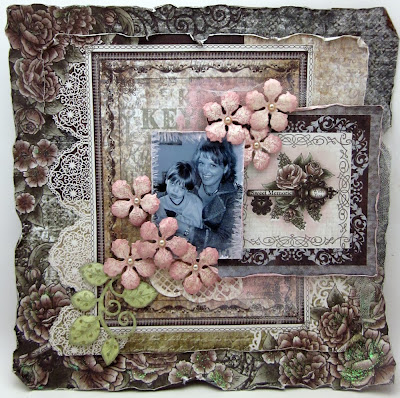
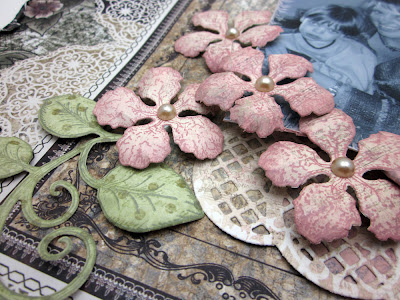
Sweet Memories with You is a 12 x 12 layout. Distress the edges of your base patterned paper. Paint a thin layer of glitter glue over the printed flowers. Cut a second layer 10" x 10" and fussy cut the printed lace edge. Distress the other edges. Stamp the Script Key Background in the open area of the patterned paper. Cut a 6 x 6 decorative paper panel, turn over and lay in the area that it will be place. Ink around the edges within the printed rectangle using the light pink ink. Remove the 6 x 6 square. Cut a mask for the square with the opening 3 5/8" square, so that only the inside printed square will show. Lay a piece of vellum or tracing paper over the central image, trace around it, and cut it out and use this as a mask over the floral key image. Stamp the remainder of the exposed paper using the wood pattern from the Floral Doorway set. Glue netting to the backside of this square and attach to layout with foam adhesives. Die cut a decorative lattice swirl and glue to the left bottom corner of the 6 x 6 square. Add your photo with foam adhesives. Stamp and cut with the matching die, Vintage Floret flowers. Arrange on layout and add a stamped and cut vine using the Beautiful You set. Add pearls to finish off the layout.
Monday, December 16, 2013
May Arts Handmade Christmas Gift Blog Hop
The May Arts Ribbonistas are having another fun hop today! We want to share with you handmade gifts that you can make using beautiful May Arts Ribbons. And since it is the giving time of year, The Ribbon Lady is going to give one lucky fan a choice of 3 spools of ribbon. Leave comments along the hop to enter (the more comments, the more chances you have to win!)
I'm not a great seamstress, but this headband I created is easy enough to sew, even I can do it!
I used scrap fabrics and sewed ribbon down the front center. I left the narrow checkered ribbon long on each end to use as ties.
I frayed some of my fabric and sewed it around the May Arts Sheer Frayed Flower.
This has already been a big hit - so I think I will be whipping some more up!
Be sure to visit the rest of the blogs to get great ideas for last minute gifts.
May Arts Ribbons Used
Subscribe to:
Posts (Atom)


.JPG)

